![]() In iOS 14, Apple's Maps app got a handful of new features and refinements, one of which is the ability to explore places with the help of Guides.
In iOS 14, Apple's Maps app got a handful of new features and refinements, one of which is the ability to explore places with the help of Guides.
Guides provide recommendations for the best places to visit in a city, offering up suggestions on places to eat, shop, and explore. Some of Apple's partners for these Guides include Lonely Planet, the Washington Post, AllTrails, The Infatuation, and more.
You can save Guides, and they automatically update when new places are added, so you always have the latest recommendations. You can also create your own Guides (previously called Collections) for later reference. Here's how to get started with Guides in Apple Maps.
How to Use City Guides in Apple Maps
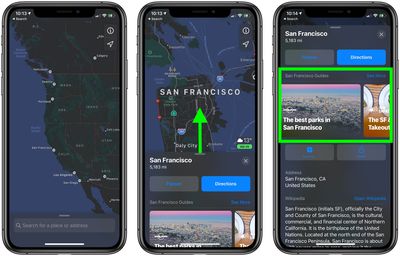
Launch the Maps app on your iPhone or iPad, tap the search field and enter a city you'd like to explore.

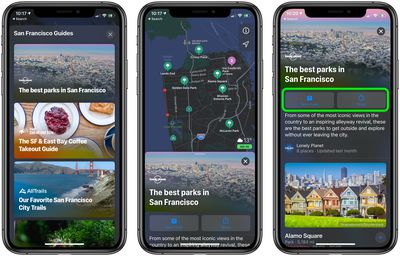
Drag up the city information panel with your finger. If the city has any Guides available, they'll appear just below the Flyover and Directions buttons in a handy carousel that you can swipe through. Tap a Guide to open it, or tap See More to view additional Guides for the city.

When you open a Guide, you'll see the featured locations plotted on the map. Tap one for directions, or drag the Guide panel up to take over the screen and explore the locations with more context.
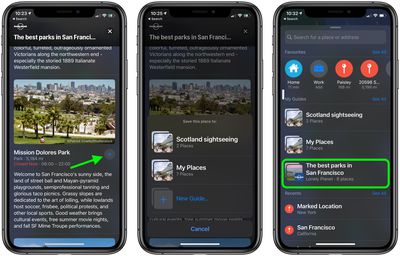
To save a guide for later reference, tap the Save button at the top. Saved Guides can be accessed anytime under My Guides in the Maps overlay panel. You can also Share a guide with someone using the adjacent Share button.

Tap the plus (+) button to add a featured location to one of your own existing Guides or to create a new one. If you're creating a New Guide, tap List to give it a name. You can also give it a photo by tapping the Camera button. When you're done setting up your New Guide, tap Create in the top-right corner of the screen.
At the time of writing, Guides are only available for some U.S. cities, but over time Apple will be adding them for other locations around the world.


