In iOS 15, Apple's stock Weather app received a major design overhaul, in part thanks to a number of features brought over from the popular weather app Dark Sky, which Apple acquired in 2020. One of those features is the inclusion of weather maps, and this article explains what they are and how to use them.

There are three full-screen weather maps available in Apple's native Weather app. They offer a bird's eye view of forecasts for local precipitation, air quality, and temperature. Note that air quality information is limited to Canada, China mainland, Germany, France, India, Italy, Mexico, Netherlands, South Korea, Spain, UK, and the United States.
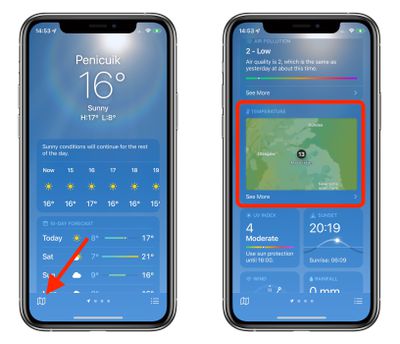
You can access the maps by tapping the small folded map icon in the bottom-left corner of the Weather app, or by scrolling down on a forecast screen, tapping on the default temperature map, and then tapping on the stack to change the view to precipitation or air quality.
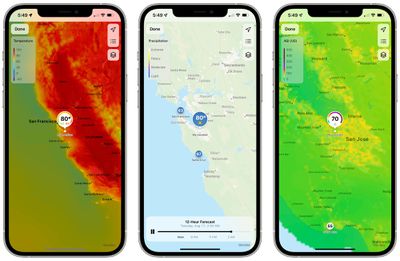
The precipitation maps are animated and show the path of incoming storms and the intensity of rain and snow. The progress bar at the bottom shows you the 12-hour forecast, which you can pause using the Pause button or scrub through by dragging the progress dot with your finger.
The stack icon in the upper right corner can be tapped to switch to the air quality or temperature maps, which likewise give you a view the conditions in your area and the surrounding areas. The icon above it lets you switch between geographical regions in your forecast list, while the top icon zooms you in to your chosen area.
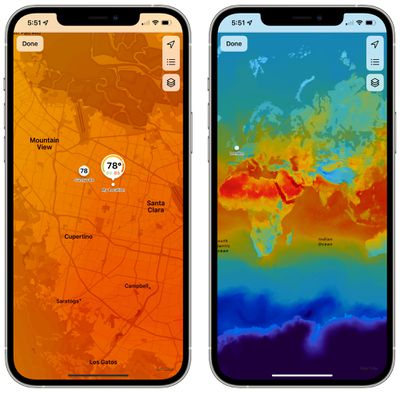
Note that you can zoom in or out as far as you want on any of the maps to get an overview of the chosen weather data.


