Apple Pay is a secure and convenient way of paying for things with your iPhone or Apple Watch when you're out and about, but it can also be used for purchasing merchandise online when you're on your Mac.
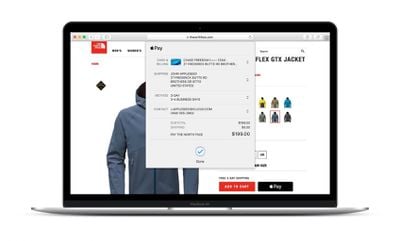
You can authorize Apple Pay transactions on your Mac using the Touch ID sensor on your MacBook Air or MacBook Pro. If you have an older Mac without a Touch Bar, you can still use Apple Pay to buy things on the web, but you'll need to use the cards stored on your iPhone or Apple Watch to pay for them. Keep reading to learn how it all works.
- How to Set Up Apple Pay in Safari on Mac
- How to Set Up Apple Pay on a MacBook With Touch ID
- How to Set Up Apple Pay on an Older Mac
- How to Allow Apple Pay Payments on Mac via iPhone
- How to Allow Apple Pay Payments on Mac via Apple Watch
- How to Manage Apple Pay Cards on Your Mac
- How to Change Your Default Apple Pay Card on Mac
- How to Remove a Card From Apple Pay on Mac
- How to Edit Your Contact and Shipping Information
- How to Edit Your Billing Address
- Using Apple Pay on Your Mac
How to Set Up Apple Pay in Safari on Mac
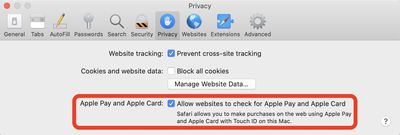
To pay for things online when you're on your Mac, you need to be using Apple's Safari. Before you do anything else, you need to make sure the browser is ready for Apple Pay transactions. Just follow these quick steps.
- Open Safari.
- Go to Safari -> Preferences in the menu bar.
- Click the Privacy tab.

- Select the checkbox next to Apple Pay to Allow websites to check if Apple Pay is set up.
How to Set Up Apple Pay on a MacBook With Touch ID
If you have a MacBook Air or MacBook Pro with a Touch ID sensor, you can authorize Apple Pay transactions from your keyboard.
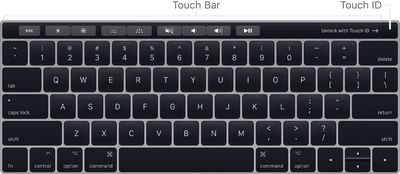
Before you do that though, you'll need to have added a credit card to Apple Pay on your Mac. You're asked to do this when first setting up a MacBook Air or MacBook Pro with a Touch ID sensor, but you can also add a card to Apple Pay in System Preferences whenever you like.
- Launch System Preferences from your Mac's Dock, from the Applications folder, or from the Apple menu bar ( -> System Preferences...).
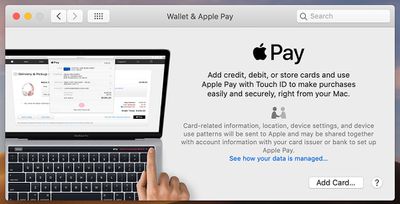
- Click Wallet & Apple Pay to open the relevant pane.
- Click Add Card... to add a credit or debit card.

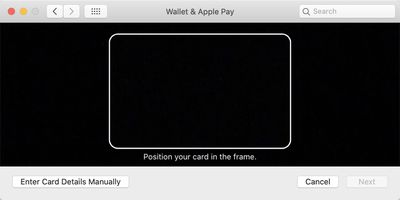
- To add your card information, hold your card in front of your Mac's FaceTime camera and position it in the frame on the screen. Alternately, you can opt to Enter Card Details Manually.

- Click Next to verify your card number.
- Verify your card number, then click Next.
- Verify your card's expiration date using the three-digit CVV or CVC security code printed on the back of the card, then click Next.
- Click Accept to accept the terms and conditions.
- Choose Email, Text Message, or Call to verify your card's setup with Apple Pay, then click Next.
- Enter the verification code sent to you via your chosen method, then click Next.
Your card should now be added to Apple Pay. Occasionally it may take a bit of time for your bank to verify your information, in which case you'll be notified as soon as your card has been approved.
How to Set Up Apple Pay on an Older Mac
If you have an older Mac that doesn't feature a Touch ID sensor, you can still use Apple Pay to buy things online, but you'll have to use the cards stored on your iPhone or Apple Watch. Before that though, you need to turn on a couple of switches on your device(s).
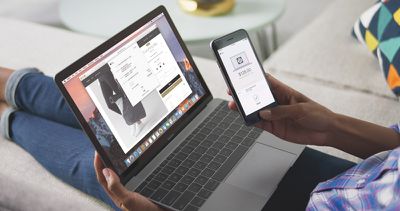
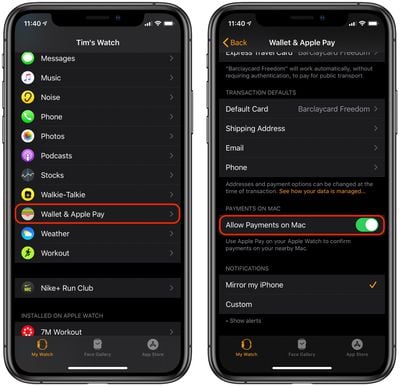
How to Allow Apple Pay Payments on Mac via iPhone
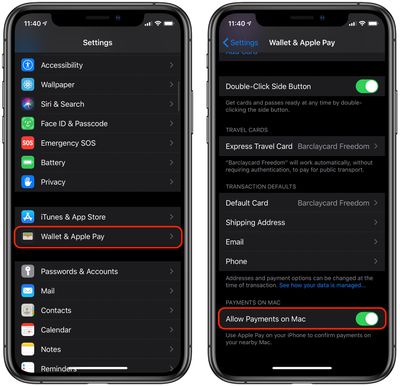
- Launch the Settings app on your iPhone.
- Tap Wallet & Apple Pay.

- Tap the switch next to Allow Payments on Mac so that it's in the green ON position.
How to Allow Apple Pay Payments on Mac via Apple Watch
- Launch the Watch app on your iPhone.
- Tap Wallet & Apple Pay.

- Tap the switch next to Allow Payments on Mac so that it's in the green ON position.
How to Manage Apple Pay Cards on Your Mac
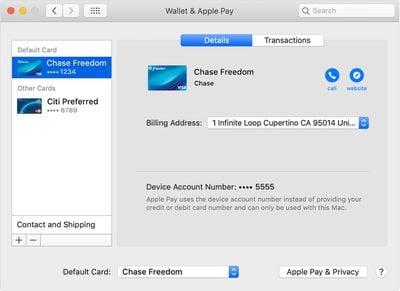
If you've added cards to Apple Pay on a Mac that has a Touch ID sensor, you can manage your cards in System Preferences.
- Launch System Preferences from your Mac's Dock, from the Applications folder, or from the Apple menu bar ( -> System Preferences...).
- Click Wallet & Apple Pay to open the relevant pane.
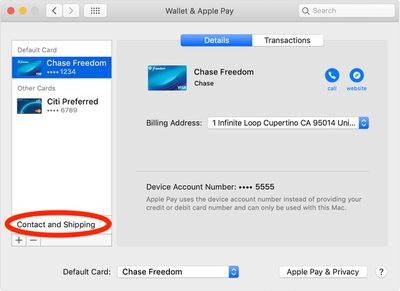
- Click a card in the sidebar to view its information, including account number, billing address, bank contact details, and transaction details.

If you're using Apple Pay on an older Mac and authorizing transactions via your iPhone or Apple Watch, you can only manage your cards on your iPhone.
How to Change Your Default Apple Pay Card on Mac
- Launch System Preferences from your Mac's Dock, from the Applications folder, or from the Apple menu bar ( -> System Preferences...).
- Click Wallet & Apple Pay.

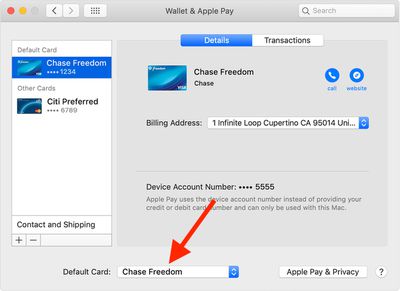
- Select your preferred card from the Default Card pop-up menu at the bottom of the preference pane.
Note that you can also change the default card that Apple Pay uses when you pay for something with your iPhone and with your Apple Watch.
How to Remove a Card From Apple Pay on Mac
- Launch System Preferences from your Mac's Dock, from the Applications folder, or from the Apple menu bar ( -> System Preferences...).
- Click Wallet & Apple Pay to open the relevant pane.
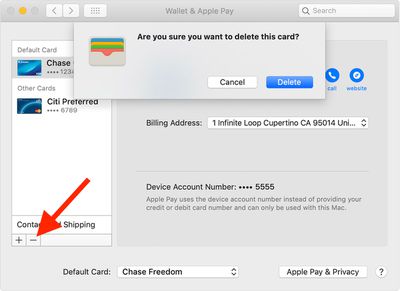
- Click the card in the sidebar that you wish to remove.
- Press the minus (-) button at the bottom of the sidebar to remove it.

- Click Delete to confirm that you want to remove it.
How to Edit Your Contact and Shipping Information
- Launch System Preferences from your Mac's Dock, from the Applications folder, or from the Apple menu bar ( -> System Preferences...).
- Click Wallet & Apple Pay to open the relevant pane.
- Click Contact and Shipping at the bottom of the sidebar.

- To change or add a new shipping address, email, or phone number, click the relevant dropdown menu.
How to Edit Your Billing Address
- Launch System Preferences from your Mac's Dock, from the Applications folder, or from the Apple menu bar ( -> System Preferences...).
- Click Wallet & Apple Pay to open the relevant pane.
- Click the card in the sidebar that you wish to change the billing address for.
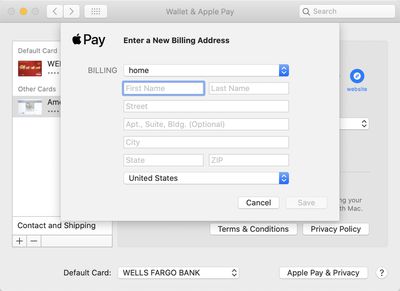
- Click the Billing Address dropdown and select Add a new Billing Address.

- Enter your new billing address in the fields, then press Save.
Using Apple Pay on Your Mac
To know if you can use Apple's digital wallet, all you need to look for is the Apple Pay symbol when checking out. Then complete your purchase using your Mac with Touch ID, iPhone or Apple Watch. If you complete your purchase using iPhone or Apple Watch, you must be signed in with the same Apple ID as on your Mac.
Still unsure how Apple Pay works when buying things online? Then check out our walkthrough, which guides you through the process step-by-step.


