In macOS, Apple's Safari browser allows you to choose the default search engine that is automatically used whenever you type something into the address bar. Keep reading to learn how it's done.
![]()
When it comes to searching the web using Safari, Apple's browser doesn't restrict you to a single search engine. In other words, you don't have to "Google" something to find out more about it online. You can use alternatives including DuckDuckGo, Bing, Ecosia, and Yahoo.
Like rival web browsers, these competing search engines all have something a little different to offer. While Google is the dominant engine, it's certainly not the most privacy-focused – that award goes to DuckDuckGo.
Bing is the second most popular search engine after Google, and uses powerful algorithms to help you find what you're looking for, while Yahoo is also powered by Bing, but it has a more lively interface. Lastly, if you're more environmentally conscious, Ecosia is likely to be your preferred choice.
How to Select a Default Search Engine in Safari
So how do you let Safari know which search engine is your default preference? The following steps show you how it's done.
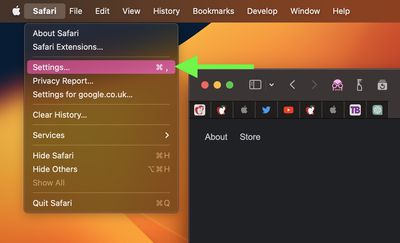
- In Safari, select Safari -> Settings... in the menu bar.

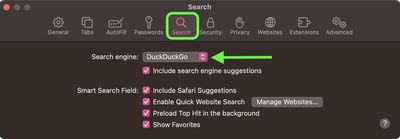
- Select the Search tab.
- Click the "Search engine" dropdown menu, and choose from Bing, Google, Yahoo, DuckDuckGo, and Ecosia.

Note that if you check the box next to "Include search engine suggestions," Safari will Ask the search engine for search suggestions based on search terms you enter, but the search engine may record your search terms.
How to Switch Search Engines on the Fly in Safari
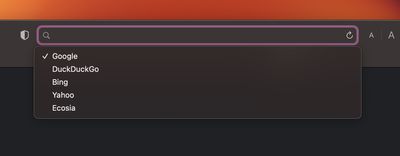
In Safari, it's actually possible to quickly switch between search engines from the address bar. Simply press the space bar before you type any words, and you'll get a dropdown menu where you can select from the browser's five search engine options.

If you use different search engines for different purposes, this is a really handy way to switch to the one you want without having to type in a web address or change your default preference in Settings.


