In iOS 16 and iPadOS 16, the Contacts app on lets you create multiple lists in which to organize your contacts. Keep reading to learn how it works.
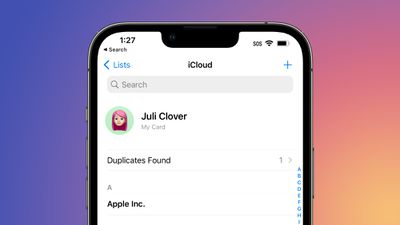
The release of iOS 16 introduced many new standout features for iPhones, like Lock Screen widgets and customization, but it also included plenty of other changes that are a little bit more hidden away in Apple's mobile OS. One such feature is the ability to create contact lists in the Contacts app.
Prior to iOS 16, Apple device users had to use the iCloud website or a Mac if they wanted to create contact lists, but now you can do so right on your iPhone and iPad. It's a great way to organize your contacts into groups such as family, friends, and work colleagues, clients, and so on. Not only does it make contacts easier to find, you can also email everyone in a specific list.
The following steps show you how to create lists in iOS 16.
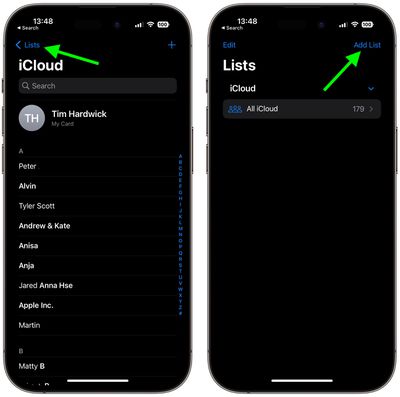
- Open the Contacts app on your iPhone. You can also access contacts using the Contacts button in the Phone app.
- Tap Lists in the top-left corner of the Contacts interface. (If you're on iPad, it's the sidebar button.)
- Tap Add List in the top-right corner, then select an account if required (iCloud is the default).

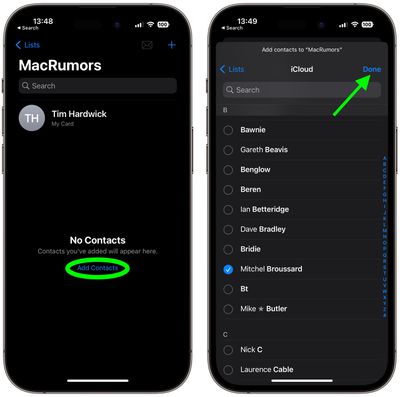
- Give your list a name, then tap it.
- Tap Add Contacts.
- Select the contacts you wish to add, then tap Done.

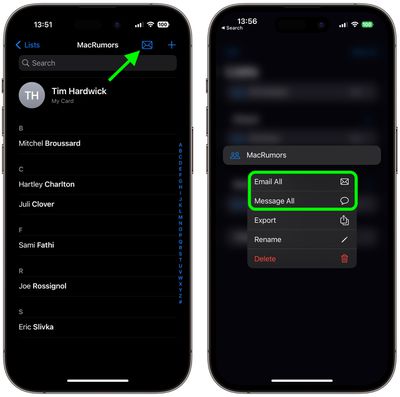
- You can now contact all the people in the list via email or Messages. To email them, you can tap the Mail icon in the top-right corner of the list. To group message everyone, tap Lists, then long press the list in question and select Message All from the popover menu.

Note that you can edit lists or delete them by swiping leftwards across a list in the main Lists screen to reveal edit and trash buttons.


