Apple's 2021 MacBook Pro models unexpectedly came with a display notch, or as Apple calls it, a camera housing, which sits dead center at the top of the screen. This article covers all the ways you can conceal the notch or at least make it play nice with your apps using software-based solutions.
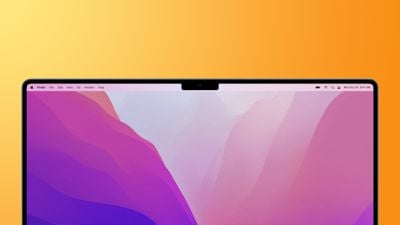
The inclusion of a notch on the redesigned 14-inch and 16-inch MacBook Pro allowed Apple to slim down the display bezels and move the menu bar up around the camera housing to leave more screen real estate below, but it was a controversial decision.
For some users, the appearance of the notch in the center of the menu bar is a blight on an otherwise fantastic screen. For others, its location actively interferes with app menu items. Either way many would rather not have it at all. Thankfully, there are ways to hide the notch to varying degrees or make it compatible with app menu bars.
Let's take a look at the available tricks below, starting with how to conceal the notch completely.
Hide the Notch With Fullscreen Mode
The easiest way to make the notch essentially invisible when you're using a specific app is to use it in fullscreen mode. If you click the green button in the row of traffic lights at the top-left corner of the app window, the app will expand to fill the screen. This automatically hides the contents of the menu bar by turning it black.
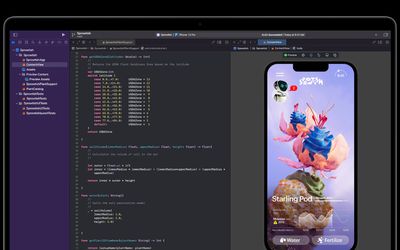
You can hover over the menu bar with your mouse pointer to reveal the menu items, but the effect is such that you don't even see the notch is there in front of you for as long as you stay in fullscreen mode. To exit out of fullscreen, simply click the green traffic light button again.
Apps That Hide the Notch Completely
If you don't like the notch staring you in the face while you look at the display, there's an app for that. While the following third-party apps don't outright cancel the notch, they at least make its existence less obvious by forcing a black menu bar, similar to how macOS Monterey adds a black bezel to the top of the display when apps are in fullscreen mode, only by adapting your chosen wallpaper instead, like so.
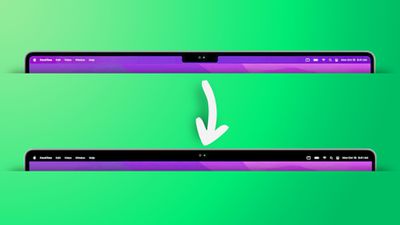
Forehead (Free): Besides letting you switch between your default wallpaper and a black notchless one, Forehead includes options to round the corners of the screen, similar to the rounded top corners of the new MacBook Pros. The ability to simulate a notch on older Macs is coming in an update.
TopNotch (Free): Offers the same features as Forehead, and also supports Dynamic Wallpapers, works with multiple displays and spaces, and remains in the background and detects for wallpaper changes.
De-Notch-ifier ($9.95): Offers the same features as TopNotch, just in the form of a dropdown menu in the menu bar. De-Notch-ifier isn't a completely new app, rather it's a pre-configured version of Boring Old Menu Bar that gives you a boring old non-transparent menu bar on macOS Big Sur and later. If you buy one app, you get the other for free.
Scale App Menu Bars to Adjust to the Notch
In some cases, older apps that make extensive use of menu bar items may have some of their content concealed beneath the camera housing, making for an unsightly appearance and difficulty accessing menu options. Going fullscreen or hiding the notch with a third-party app doesn't solve this issue, so what can be done to fix it?
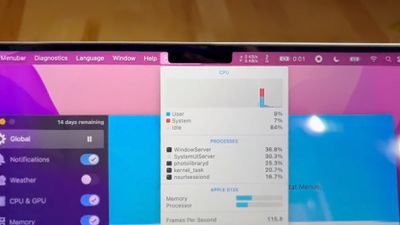
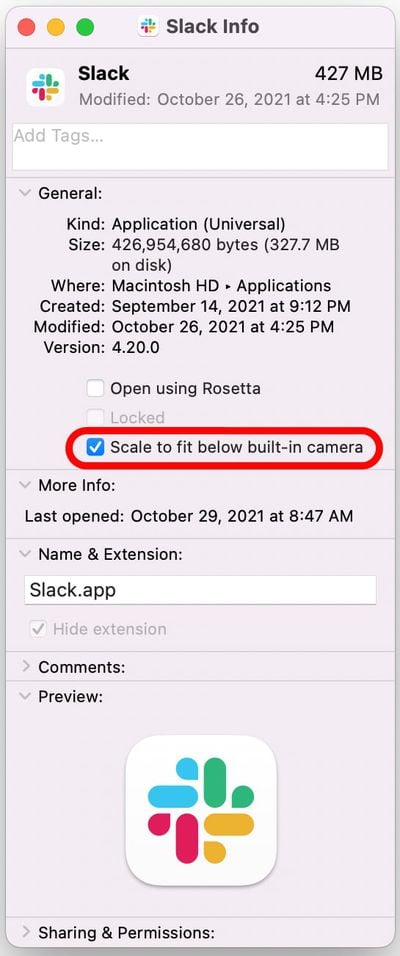
Fortunately, Apple was wise to the potential issue of having menus or menu items in the menu bar inadvertently being hidden behind the notch. In macOS Monterey, there is a compatibility setting called "Scale to fit below built-in camera," which adjusts an app's settings so that it either uses the whole display or uses only the area below the camera housing.
"Scale to fit" ensures the menu bar and app windows appear below the built-in camera on your Mac and are always visible. Moreover, if the app has menu bar items or windows that would appear behind the camera housing, all open apps or apps that share the same space appear below the camera until you quit the app using the scaled setting.
Here's how to turn it on for an individual Mac app.
- Close the app that you want to adjust for the notch.
- Launch Finder and select the Applications folder.
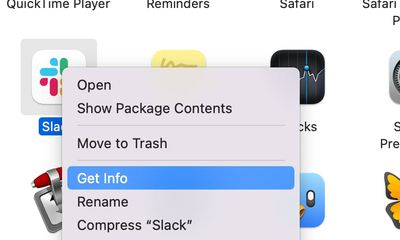
- Right-click (Ctrl-click) the icon for the app in question and choose Get Info.

- Check the box next to Scale to fit below built-in camera.

Now restart the app, and as it launches you should see the screen automatically scale to fit its entire menu bar below the notch area, ensuring all of the app's menu bar items stay visible.


