When you first subscribe to Apple Music, you're asked to provide information about your favorite genres and artists so that it can offer you accurate suggestions and curated playlists as soon as you start using the service.
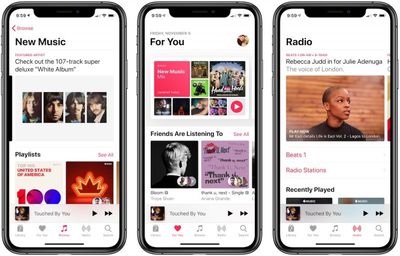
This personalization gradually improves as you continue to use Apple Music, and the best way to influence it is to generously use the Love and Dislike buttons.
How to Use Apple Music's Love and Dislike Buttons
Next time you're playing a song or listening to a custom-generated or live radio station, tap the ellipsis button at the bottom right of the screen.
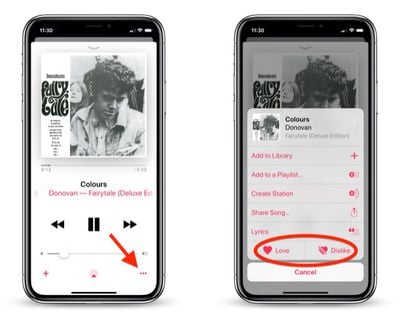
This brings up an additional options pane, at the bottom of which you'll see Love and Dislike buttons. You can tap either of these, and Apple Music will use your preference to guide its recommendation algorithms going forward.
You can also access these buttons to indicate whether you enjoy an album or not. From any album screen, tap the red ellipsis button in the upper right area of the screen.
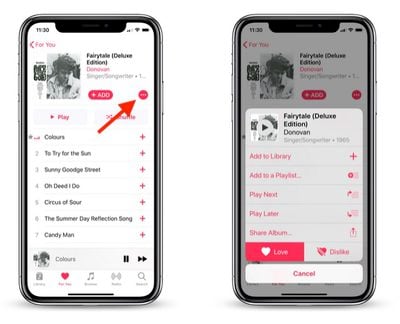
This brings up a smaller pane of options, but you'll still find the Love and Dislike buttons at the bottom.
If you're listening to Apple Music on a PC or Mac, you can find the Love and Dislike options in iTunes via the Song menu bar menu.
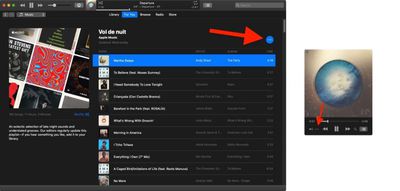
They can also be accessed using a similar ellipsis button that appears in the upper left of the album/playlist window, and at the bottom of the mini player view.
Dealing With Inaccurate Recommendations
Occasionally, you may find that Apple Music continues to play songs by artists or from genres you've indicated you don't like. This appears to be tied to the way Apple's algorithms use your listening history and the albums in your music library.
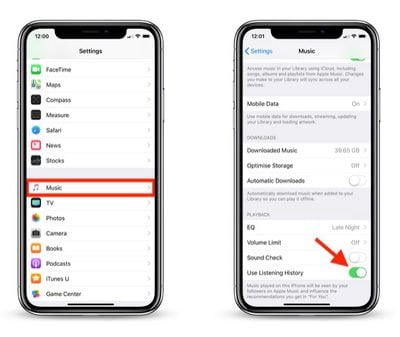
It's worth checking your library to make sure you haven't accidentally added any songs or albums you don't like (if you have, you can easily delete them). Another solution you can try is to launch the Settings app on an iPhone or iPad, then tap Music and turn off the Use Listening History toggle.


