 Setting up a guest account on your Mac provides a simple and convenient way for other people to use your computer without handing them access to your private data and digital workspace.
Essentially, a guest account allows a friend, family member or co-worker to perform basic computing tasks on your Mac while ensuring that your personal data and account settings remain private and secure. Anyone using a guest account with full privileges has access to your Public and Desktop folders (located in Users/[Username]/), where they can save files, but everything else on the system remains inaccessible.
Moreover, a guest account is temporary, meaning once the user logs out, all their information and files are deleted, thereby preserving their privacy and your storage space. With that in mind, here's how to set up a guest account in macOS.
How to Create a Guest Account
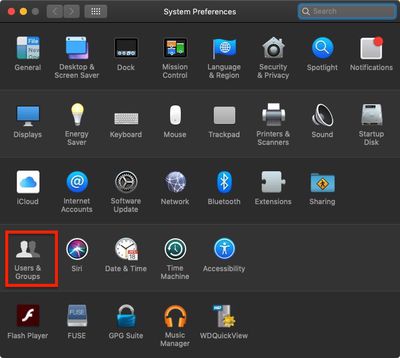
- Click the Apple () symbol in the top left corner of your Mac's screen and select System Preferences....

- Click Users & Groups.

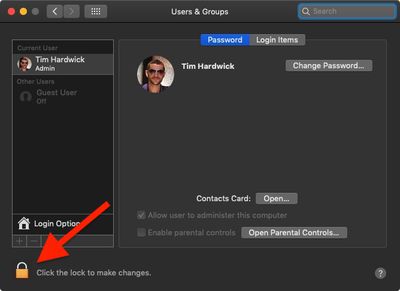
- Click the lock in the lower left corner of the window.

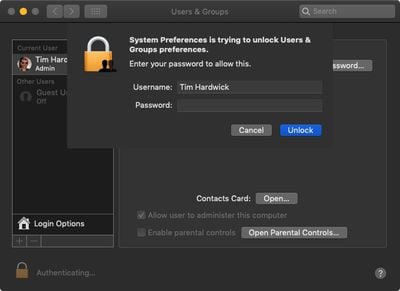
- Type in your admin password if prompted.
- Click Unlock.

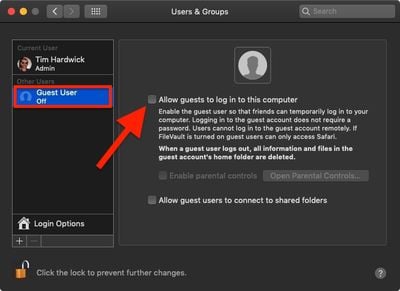
- Click Guest User.
- Click the checkbox alongside Allow guests to log into the computer.
Using Parental Controls for a Guest Account
Following the above steps, you may have noticed that you can optionally set up a guest account with parental controls by ticking the associated checkbox.
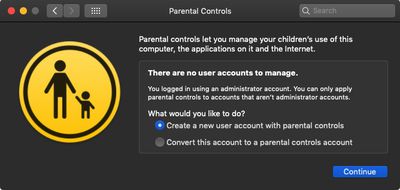
While many of these settings are aimed at restricting what children can do, there are a few options that may come in handy for limiting guest users of any age.
For example, you can create a whitelist of allowed apps and websites, set time limits based on a schedule, and even prevent users from changing the settings of peripherals like printers and scanners. For more information, check out our separate guide on managing restrictions in Parental Controls.


