Whenever you move a file on your Mac to the Trash, it stays there until you manually right-click (Ctrl-click) the trash icon and select Empty Trash. This system offers a useful fallback method if you decide you don't want to delete a file, because it allows you to return a file to its original place using the Put Back option (accessed via a right-click on the trashed file in question).
In macOS Sierra and later, Apple also offers an option that can automatically empty your Mac's trash every 30 days. It's a useful feature if you find you have a large turnover of redundant files every month, and it helps you to free up storage on a regular basis. However, locating the option to enable it isn't so obvious – read on to find out how it's done.
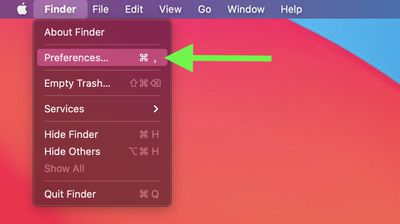
- On your Mac, click the Finder icon in the Dock or click anywhere on the desktop, then select Finder -> Preferences... from the menu bar.

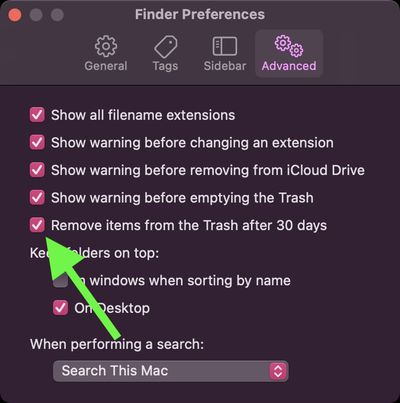
- In the preferences window, click the Advanced tab.

- Locate the option labeled Remove items from the Trash after 30 days and check the box beside it.

Once you've done that, your Mac will automatically delete all the files in your Trash every 30 days. To disable the option at any time, simply repeat the steps above but uncheck the box next to the associated option.
If you're looking for other ways to free up local storage and you have iCloud, check out the Optimize Mac Storage option.


