![]() The Photos app on the iPhone and the iPad has had pre-set filters for a number of years, but Apple previously provided no way to adjust the effect those filters had on your pictures.
The Photos app on the iPhone and the iPad has had pre-set filters for a number of years, but Apple previously provided no way to adjust the effect those filters had on your pictures.
Happily, iOS 13 adds a simple way to change the intensity of pre-set filters, giving you a little more agency over your photo enhancements. Keep reading to learn how it works.
Before you follow these steps, make sure you've updated your device to iOS 13 (or iPadOS 13). You can check that your software's up-to-date by launching the Settings app on your iPhone or iPad and tapping through to General -> Software Update.
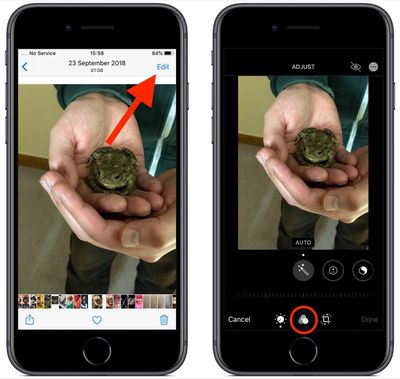
- Launch the Photos app on your iOS device.
- Select a picture in the Photos tab by tapping it.
- Tap Edit in the top-right corner of the screen.

- In the black-bordered Edit interface, tap the Filter icon (it looks like a Venn diagram) at the bottom of the screen.
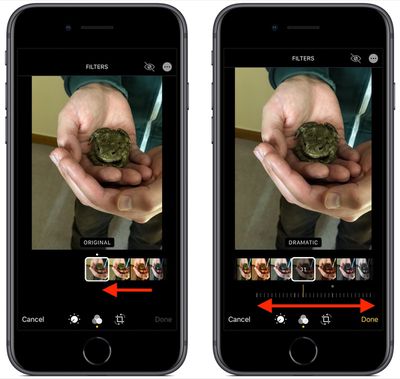
- Tap a filter to preview its effect on your photo. You can swipe along the strip of filters with your finger to reveal more effects.

- Notice the dial that appears below the selected filter – swipe left or right on it to adjust the intensity level of the filter.
- Tap Done when you're happy with the filter effect.
Remember that you can gain access to the same filter adjustment tools whenever you take a picture using the stock Camera app - you don't even need to unlock your device to do so.


