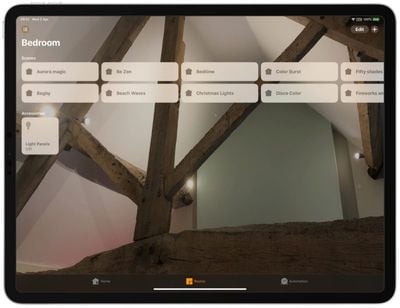
In Apple's Home app, you can add your HomeKit accessories to different rooms for organizational purposes. Once you've done that, you can group together similar rooms into zones which allows you to control them all at once, either by room or by zone. Keep reading to learn how it works.

How to Add Rooms to the Home App
Before you can add rooms to the Home app you need to add some HomeKit accessories to it. Once you've done that, you can follow the steps below to add rooms.
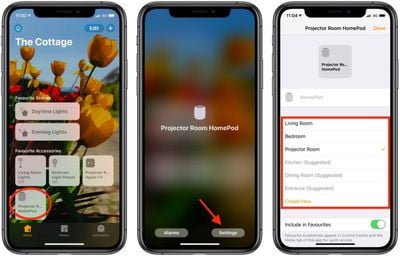
- Launch the Home app on your iPhone or iPad.
- Press and hold on an accessory.
- Tap Settings.

- Tap Room.
- Tap Create New and enter the name of your room, or choose from the suggested room names.
- Tap Done.
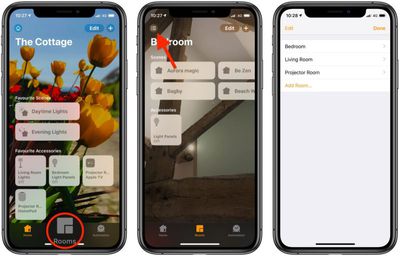
Once you've assigned a room to an accessory, that room will appear in the above list of available rooms to make it easy to add further devices. You can access rooms you've set up by tapping the Room tab and then tapping the menu button in the top-left of the screen.
How to Group Rooms into Zones
Grouping rooms together into a zone, like upstairs or downstairs, allows you to control several rooms using a single Siri command. For example, you could simply say "Hey Siri, turn off the lights downstairs" when you're making your way up to bed for the night.
- Launch the Home app on your iPhone or iPad.
- Tap the Rooms tab at the bottom of the screen.
- Tap the menu button in the top-left corner of the screen.

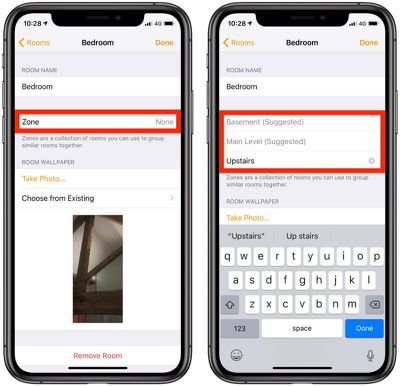
- Tap Room Settings and then select a room.
- Tap Zone.
- Enter the desired name of your zone or choose a suggested name.

- Tap Done.
- Repeat steps 3 to 7 to add more rooms to the zone.
Organizing your HomeKit products into rooms and zones is essential for setups that include a large number of HomeKit devices, and it's really useful for HomeKit products like lights, where you might want to turn out all of the lights in a room or in the entire upstairs at one time.


