In iOS 17, Apple has added several new features to its Messages app to make communicating with other Apple users more creative and fun. One such feature is the ability to add effects to your stickers. Keep reading to learn how it works.
iMessage stickers arrived way back in iOS 10, allowing users to resize stickers, put them on top of chat bubbles, add them in photos, and stick them on top of other stickers, with simple controls for dragging.
Stickers have come a long way since then. In iOS 17, for example, users are now able to create their own stickers from photo subjects, and even add neat little effects to individual stickers to change up their look.
There are a number of effects that can be added to stylize your stickers, including a white outline, comic-like shading, a puffy 3D look, and a shiny, holographic finish. The sticker effects will animate and reflect the light appropriately, making your self-created stickers look professionally done.
The following steps show you how sticker effects are applied in iOS 17.
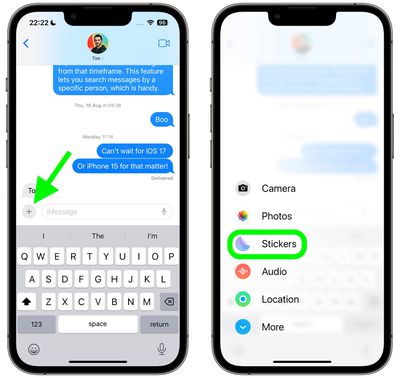
- In a Messages conversation, tap the + button next to the text input field.
- Tap the Stickers option in the vertical list that appears.

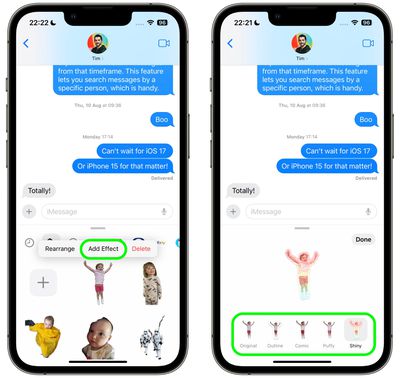
- Press and hold on an individual sticker until it "pops," then tap Add Effect in the popup menu.
- Tap one of the available effects options: Original, Outline, Comic, Puffy, or Shiny.
- Tap Done to finish.

That's all there is to it – your stylized sticker is now ready to be shared with the world.
Did you know that another new Messages feature in iOS 17 is the ability to turn Live Photos into Live Stickers? Click the link to learn how it's done.


