Like all credit cards, Apple Card requires that you have a bank account for making payments. As you might expect, Apple makes it easy to select a bank account for Apple Card payments using the Wallet app on your iPhone.
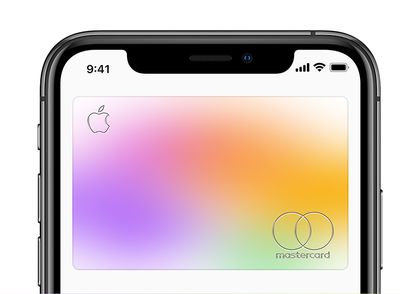
The first time you add a bank account, you'll be asked if you want to add the same bank account that you use with Apple Cash (assuming you've set up Apple Cash). If so, all you need to do is say yes, and you're good to go. Otherwise, you can manually add a different bank account for your Apple Card.
You can add multiple bank accounts to your Apple Card, but the first one that you add becomes your default bank account for making payments. To add a bank account, you'll need your bank account number and bank routing number. With those ready to hand, simply follow these steps.
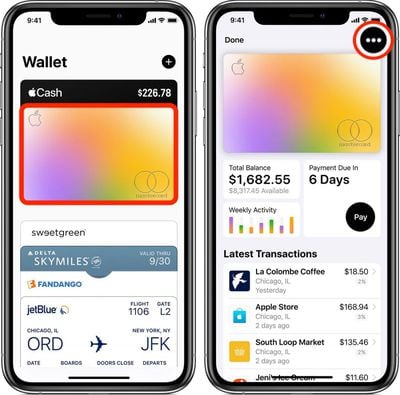
- Launch the Wallet app on your iPhone.
- Tap your Apple Card.

- Tap the black ellipsis button (the three encircled dots) in the top-right corner of the screen.
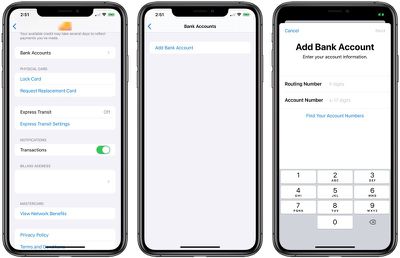
- Scroll down and tap Bank Accounts.
- Tap Add a Bank Account.

- Follow the onscreen instructions.
If you need to, you can easily delete a bank account from the Bank Accounts screen by tapping Edit and then tapping the red minus (-) button next to the bank account in question. Be aware, though, if you have scheduled payments set up, you'll need to shut those off before you can remove your bank account.
Did you know you can also use any Apple Cash that you've accrued to help make immediate one-time payments to your Apple Card? Click here to learn how it works.


