 macOS features powerful parental controls that, once enabled, allow you to monitor and restrict the time your children spend on your Mac, ensuring they enjoy a safe and secure experience.
You can set up custom parental controls for each child who will be using your Mac by adding separate user accounts. Alternatively, you can set up a guest account with parental controls enabled.
The below steps show you how to turn on parental controls for an existing user account. To create a new user account on your Mac with parental controls, check out our separate how-to article on the subject.
How to Turn on macOS Parental Controls for an Existing User Account
- Click the Apple () symbol in the top left corner of your Mac's screen and select System Preferences....

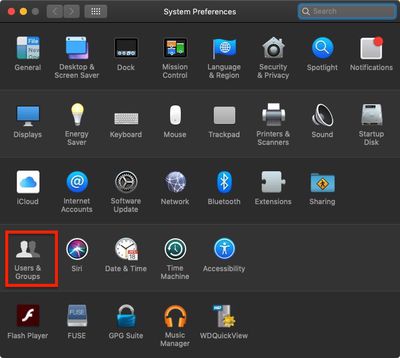
- Click Users & Groups.

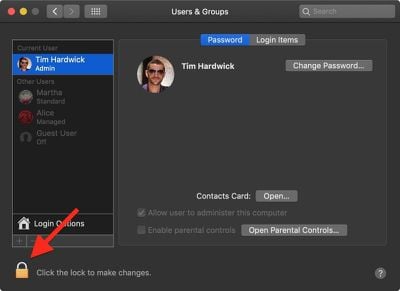
- Click the lock in the lower left corner of the window.

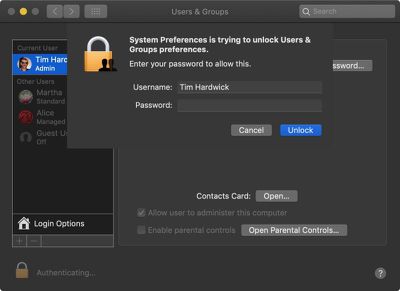
- Type in your admin password if prompted and click Unlock.

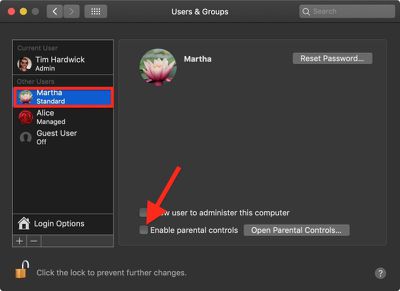
- Select a user account in the side column and then tick the checkbox next to Enable parental controls.
- Click the lock again in the lower left corner of the window to secure your changes and finish.
Once parental controls are enabled, you can manage them in System Preferences and do things like create a whitelist of allowed apps and websites, set time limits based on a schedule, and even prevent users from changing the settings of peripherals like printers and scanners. For details on setting up parental controls, make sure to check out our how to.


