Apple today released iOS 17 to the public, and there are hundreds of new features and changes for you to learn about. Some of these options require some set up to get up and running, so we've written this guide that walks you through what you should do after installing iOS 17.
Set Up Your StandBy Screen
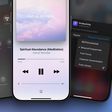
When you charge an iPhone running iOS 17 in an upright and horizontal orientation, it displays a new StandBy screen. StandBy serves as a home hub to show glanceable information that makes your iPhone more useful when it's not being actively used.

StandBy is most useful on the iPhone 14 Pro models with always-on display, but it is available on all iPhones that run iOS 17.
There are three total StandBy screens that you can access by swiping between them when your phone is in the appropriate StandBy position. The first screen displays widgets (including interactive widgets), the second showcases photos from the Photos library, and the third is a large clock that shows the time.
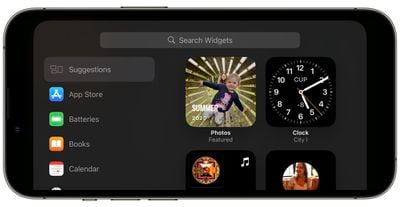
You will want to customize your two widget stacks on the widget screen to make it more useful, and you can also customize how the time is displayed and the photos that you see. Customizing is done by swapping over to the correct screen and long pressing on it to get to the customization options.
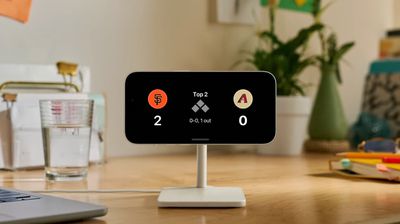
StandBy can show you incoming notifications, Live Activities, and Siri queries full screen. When you use StandBy with different MagSafe chargers in separate locations, you can customize your phone to remember which screen configuration you prefer based on location. For example, you might prefer widgets when at the office, or the clock screen when the iPhone is on your nightstand.
StandBy can be a little bit complicated when you're not familiar with it, so we recommend looking through our StandBy guide to see the full extent of what you can do with it.
Prioritize Interactive Widgets
Lock Screen and Home Screen widgets are interactive in iOS 17, which makes widgets much more useful. You can do things like check off a reminder or activate a home device right from a widget without having to open an app.
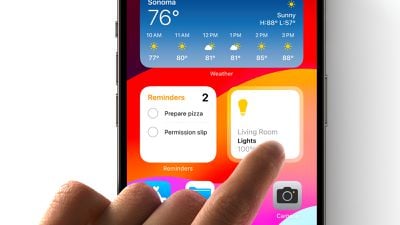
Both Apple apps and third-party apps are able to use the new interactive functionality, so you might want to redo your widget setup now that certain widgets are more useful.
Lock Screen widgets can be customized by long pressing on the Lock Screen, choosing a Lock Screen option, and then tapping "Customize." From there, select the Lock Screen and then tap into the widgets box to choose your widget options.
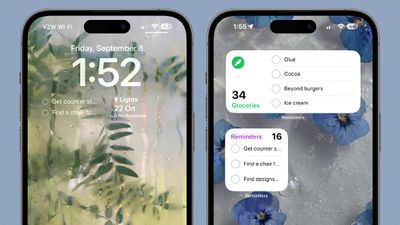
On the Home Screen, long press, tap on the "+" button in the upper left corner, and select the widget that you want to add.
Customize Your Contact Poster
In iOS 17, there's a customizable Contact Poster that people see when you call, FaceTime, or text them. You can customize it with a photo, Memoji, Animoji, or an initial, and choose the colors and fonts that you prefer.
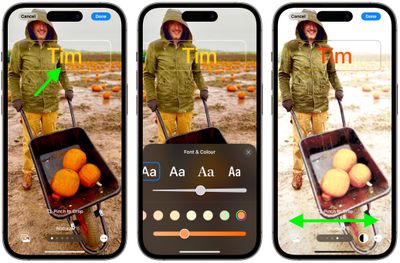
When you install iOS 17, you'll be prompted to make a Contact Poster, but you can tweak it at any time in the Contacts app. Just open Contacts, tap on "My Card" and then tap on "Edit" in the upper right corner to get to the editing interface.
From there, you can choose a photo, select a color for the text, add a filter, and more. You can have multiple Contact Posters to swap between, and you can create a Contact Photo that's different from your Contact Poster.
The Contact Poster and Contact Photo that you choose will be shared with others when you call or message them, but there are some settings you can use to restrict access. You can choose to share your photo and poster automatically with all of your contacts, or you can have your iPhone get permission from you first. Name and photo sharing can also be disabled entirely if you prefer.
Make Sure Live Voicemail is On (U.S. and Canada Only)
Live Voicemail is a new feature that lets you see a transcript of a voicemail as it's left, so you can pick up if it's an important call. You can make sure Live Voicemail is enabled by opening up the Settings app, tapping on Phone, scrolling down to Live Voicemail and toggling it on.
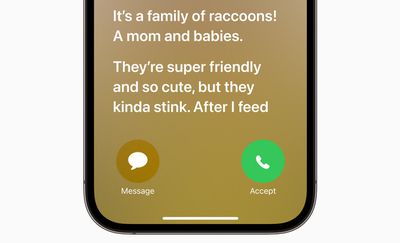
With the option turned on, when someone begins to leave a voicemail you will see a the transcript of what they have to say right on the Lock Screen. You can ignore it or answer the phone. During the beta testing process, Live Voicemail's wording was a bit confusing for callers, but Apple has since addressed that issue.
If you find Live Voicemail irritating, toggling it off will disable it and your voicemail will return to normal.
Create Your Own Stickers
Apple in iOS 16 added a Remove Subject from Background tool that lets you remove the primary object from any image. In iOS 17, when you use this feature, you can turn the subject of an image into a sticker.
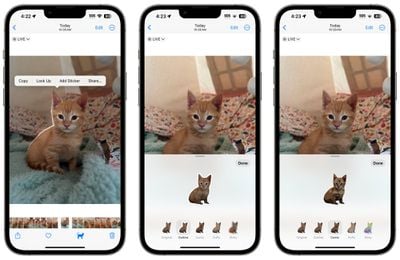
To get it to work, choose any photo with main subject. Do a short tap and hold on the subject of the image and at the text popup, choose "Add Sticker."
From there, you can choose a sticker effect, such as adding a puffy look, including a white border, adding a glitter effect, and more. Some stickers will animate if they are pulled from a Live Photo, and the stickers that you can create can be used across the operating system.
With iOS 17, Apple also merged emojis and stickers into one, so stickers work wherever you can use emoji.
Set Up New Safari Profiles
In iOS 17, Apple added a Profile feature that is designed to let you separate your browsing for different use cases. You can create a "Work" profile and a "Personal" profile, for example, so all of your work-related browsing is kept separate from your personal browsing.
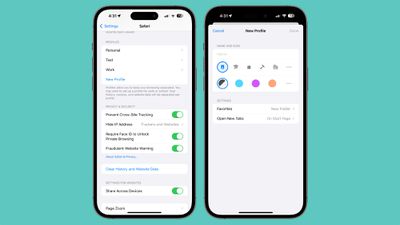
Each profile has separate cookies, browsing history, extensions, and website data. You can turn off cookies and pop-ups on one profile, for instance, leaving them on for another profile. Profiles also have separate Favorites and Tab Groups.
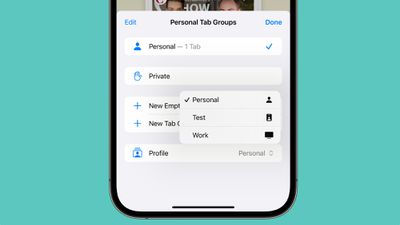
To set up your separate profiles, open the Settings app, select Safari, tap on New Profile, and choose an icon, name, and background color.
Turn on Anti-Tracking
URLs in iOS 17 can be stripped of all tracking information appended to the end of the URL so that websites cannot track your browsing using URL identifiers. This function is enabled automatically for private browsing in iOS 17, but it can be turned on for all browsing.
![]()
To turn it on, open up the Settings app and go to Safari. Tap on Advanced, then tap on "Advanced Tracking and Fingerprinting Protection." From there, toggle on "All Browsing." The setting will ensure that URLs opened in Safari will strip any tracking information at the end of a URL.
Share Your iCloud Keychain Passwords
iOS 17 lets you securely share passwords and passkeys stored in iCloud Keychain with friends and family members. Through the sharing feature, passwords for media accounts, utilities, bills, and more can be accessed by multiple people.
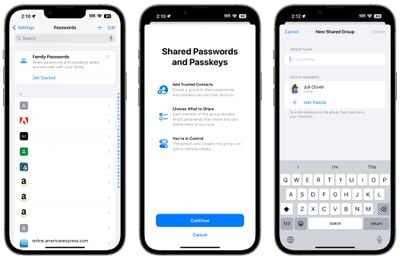
Passwords can be shared by opening up the Passwords section in the Settings app and tapping on "Get Started" under the Share Passwords with Family banner. Alternatively, you can tap the "+" button and create a new shared group. You can have multiple separate password sharing groups with different people.
Name Your Pets in Photos
In the Photos app, the People album is now the Pets and People album because the iPhone can recognize dogs and cats. Once you've let your iPhone charge for a bit, head into the Pets and People album and you'll be able to identify your pets and other animals that you have photos of, adding a name just like you can with people.
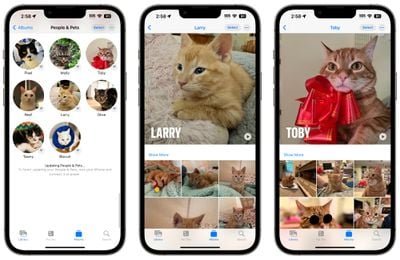
You can review additional photos to add more, watch a slideshow, and more.
Log a Mood
Apple added a mood tracking feature to the Health app in iOS 17 so you can track your mental wellbeing over time. To get to it, open up the Health app, go to Browse, and tap on Mental Wellbeing. Choose Log under State of Mind, and you can select your mood
![]()
You can set a mood for the current time or an overall mood for the entire day, choosing the factors that might have influenced your mood such as work or a relationship. You can see how your mood changes from week to week and what impacts how you're feeling.
You can set up notifications to remind you to log your mood, and if you have an Apple Watch, you can do mood logging from your wrist.
Share an AirTag
AirTags can be shared with family members, so if your partner or your child borrows an item with an AirTag, they'll no longer get alerts about an unknown item traveling with them. This also goes for items that have Find My integration.
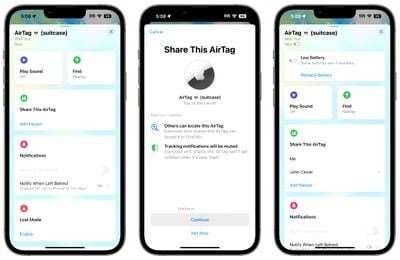
To share a device, open up the Find My app and choose the items tag. Select an AirTag or an item and tap on Share This AirTag. From there, you can choose a contact to share the AirTag with.
Try Out New AirPods Pro 2 Features
AirPods Pro 2 have multiple new features in iOS 17 that you'll want to test out. Adaptive Audio combines Active Noise Cancellation and Transparency into an all-in-one mode that adjusts the volume of what's playing based on what's around you and your interactions throughout the day.
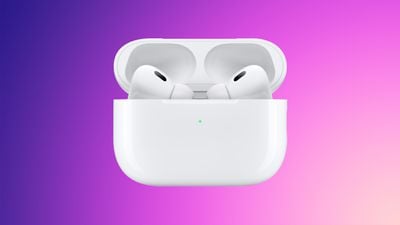
With Conversation Awareness, the AirPods Pro 2 can detect when someone is speaking to you, turning down the volume of media and cutting down on background noise. Personalized Volume will also adjust the sound of what's playing based on personal preference and the sounds around you.
Automatic Device Switching is also quicker, plus if you press on the stem of the AirPods Pro 2 while on a call, you can mute and unmute yourself. More on the new AirPods Pro 2 features can be found in our guide.
More on iOS 17
For more on all of the new features that have been added in iOS 17, make sure to check out our dedicated iOS 17 roundup.


